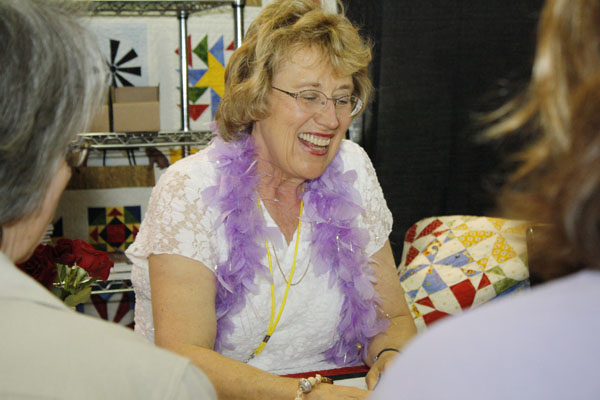
Thursday, September 23, 2010

Hello?


If you call me and I don't answer, I apologize.


If you text me, I am going to need you to call me so that you can tell me what your text says.


I will call/text you back.... eventually.


Earlier this week my husband needed a new cell phone. After about an hour in the phone store, we decided that he is not really ready for top notch technology. To make a long story short, he now has my old phone and I have a brand new, newfangled phone with a touch screen. We decided that with all of my traveling, it would be nice to have Internet access on my phone. Now I have to learn to use it. My husband told me it would be simple, I think he used the phrase "anyone can do it". This is the same man that was adamant with the clerk at the phone store that whatever phone he chose, she would have to transfer his ENTIRE contact list to the new phone. There was no way he would find time in his busy schedule to type ALL of those numbers into a new phone. She agreed to perform the service at no charge. I'm sure that she was wildly amused when she discovered that my husbands extensive list of contacts, that he said would take "forever" to transfer, contained exactly EIGHT numbers. I am not married to a phone geek.


My new phone is sleek and wonderful, and I have no idea how to use it. It has been a very busy week getting ready for Fall Festival at the Chautauqua Institute. It has not been a good week to learn new technology. I thought I would start with the instruction book. Have you seen the instructions for the new phones? The booklet that explains how to make a call, send and receive text messages, access the Internet, play games, track your entire life with an "App", take photos and about a zillion other functions is smaller than the phone!


My first clue that this would not be as easy as I thought was when I discovered that the print in the teeny tiny booklet was too small to read - and I was wearing my glasses! I had my son give me a few tips, a quick lesson on the 19 things I have to touch to get to the screen that allows me to dial. Answering is still a bit tricky and you can forget finding text messages. I set the tone that lets me know when one arrives, so at least I know I'm missing something. I just have absolutely no idea how to retrieve them.


At the store the clerk was more interested in showing me how to download Apps. She flipped a few things, handed me the phone and said "Go ahead, type in anything you are interested in" I typed in "quilt". She looked at me and said "really?" Meanwhile up popped 4 new "Apps". One was marked "Binding Calculator" and it was free, so I touched it. I now have an App on my phone that allows me to calculate quilt binding. I don't really need that app, I can calculate binding in my sleep, but it was free, and it is the only thing on my phone that I know how to use, so I am keeping it.

Wednesday, September 15, 2010

On the Road - AGAIN!

In my last post I mentioned that I was off to Chicago for more Bernina training. I wasn't kidding and as you can see from the photo, neither was Bernina. This is what the hotel ballroom looked like as over one hundred of us arrived to a find a sea of 830 boxes ready and waiting for us to unpack and get down to sewing. That is exactly what we did and every minute of it was a learning experience.

We did some amazing things with the 830 in our action packed days, although I do have to say that I think we could have accomplished even more if they didn't stop to feed us every 2 hours!
All that eating wasn't necessarily a bad thing, meal times were spent getting to know our fellow dealers. I had breakfast, lunch and dinner with some old friends and many new ones. Getting to know Beverly and Nancy from Abigayle's Quiltery in Olmstead Falls, Ohio was an absolute delight. That came in handy for my next road trip.

I was scheduled to teach and speak at Quilts'N Gifts in Bluffton, Indiana last weekend. Mary Porrata the owner had requested that I bring as many quilts as possible with me for the event. When you are traveling with quilts, the only way to make sure they arrive safe and sound is to travel by car. Quilts are HEAVY and it only takes one or two to put you over the weight limit. Although we love our men in brown, and they "guarantee" delivery, if they don't deliver, the guarantee only means they return your shipping expense. I would still be left standing in the middle of an empty ballroom with no show and tell for my lecture. So my husband packed up the car and we left a day early for Indiana.
Not having to hurry meant that I could toss the Quilter's Travel Companion in the car and program the Garmin for one quilt shop after another. Stop #1 was to visit Nancy and Beverly at Abigayle's. Just a bit over 2 hours from Pittsburgh, this shop and the wonderful little village that they are located in, is well worth the trip. Both Nancy and Beverly are delightful and tons of fun. If you stop by, be sure to drool over their wonderful samples and then wander upstairs to see their classroom that is completely stocked with 830 machines. - can you tell I am jealous?

Stop #2 was in South Amherst, Ohio at Quilt's and Creations. As luck would have it - they were having a SALE! Located in a 100+ year old building right on Main Street, this shop is easy to find and very well stocked. Don't worry about shopping after a sale here, there will still be plenty of bolts to choose from.

I couldn't resist taking my husband to The Door Mouse in Betsville, Ohio for stop #3. This shop, which qualifies as being located in "the middle of nowhere" in my book, has more fabric in the building than any other shop I have ever been to. When you own a store and your husband does your accounting, it helps if you show him shops that make you look like you are controlling your inventory! The Door Mouse is packed with fabric. Perfectly organized, neat, clean, aisles of overwhelming amounts of fabric. They have great samples too, on the walls of the "second floor". You can see them from the loft, which is filled with flannel. If you visit this shop, take a map with you. My Garmon never did find it and google maps insists that it is located in Kansas, Ohio.


Our 4th shop was in Bluffton, but the Ohio Bluffton, not the Indiana Bluffton. Forever In Stitches is located on Main Street in a picture perfect small town. The shop is beautiful and much to my surprise I ran into a customer that has moved to that area and now works in that shop. I looked around a little, but both my husband and I were fascinated by the TWO Gammill quiting machines in the back of the store. We had a lovely visit and stopped at the ice cream store on the way out of town as we headed for the Bluffton in Indiana.


The remainder of the weekend was spent with Mary at Quilts'N Gifts. Saturday I taught 2 classes to a delightful group of customers that will be the first to attest that I can TALK about quilting! Mary provided a great lunch and we all enjoyed her store. I was especially amused at Mary's use of all of her available sales space, including the ceiling!


Sunday I was the featured speaker at Mary's customer appreciation luncheon at the local Country Club. Now you know why Mary wanted me to bring as many quilts as possible. She wrapped the room with quilts, including the entrance and hallway. The majority of the quilts were mine, but she also included a few customer quilts that were made as part of my 9 patch summer challenge that launched right here on the blog. It was an absolutely delightful way to spend the weekend. We headed home on Sunday evening and enjoyed a beautiful drive through the Ohio countryside.

Tomorrow I head for Eden, New York to do another presentation and next weekend, the Chautauqua Institute for Fall Festival. Then I really am going to stay home and SEW - until Quilt Market at the end of October!

Tuesday, August 24, 2010

My Life As A Long Haul Trucker

I don't really drive a big rig. I drive a mini van. What many of you would consider a brand spanking new mini van, we only took delivery of it at the end of June. I would much prefer to be driving something small, sporty, with dual exhaust and 5 on the floor. Owning a quilt shop means that you haul a lot of "stuff" with you when you travel for work. So much stuff that something small and sporty would never do.

The reason that I feel like a long haul trucker is that when I arrived at work today and parked my brand spanking new mini van the odometer read 6314 miles. A mere 61 days old and I am averaging a little over 105 miles per day. That is a lot of mileage for someone that has a commute to work that is measured in FEET!

Most of the mileage accumulated making 2 trips to Florida. The first was for a wedding at the beginning of July, the second was last Thursday, returning our daughter Lindsay to college in Jacksonville. I drove Pittsburgh to Jacksonville, moved her into her dorm room, and drove back home to Pittsburgh in 36 hours. Then I drove to Maumee Ohio, near Toledo the very next day for the Checker Open House. Checker is our favorite wholesale distributor and I was scheduled to give a lecture on Sunday and demonstrate my new Creative Grid ruler to other shop owners on Monday. It was great fun - even if it did require an additional 3 1/2 hours of driving- each way!

This is a wholesale event for shop owners only.
On Sunday the shop owners were treated to lectures by Electric Quilt, myself, Sue Hausmann and Eleanor Burns. Between and after the lectures they shop the warehouse for goodies to take back to their stores. On Monday the shopping frenzy included the opportunity to stop by one of 20 or so booths and chat with designers, authors and manufacturers of a whole assortment of product. That is me in the back corner demonstrating my new Creative Grid Quick Trim ruler. - you are going to love it!

Susan and Mary Jane of the Quilt Branch, authors of the "Six Halves Make A Whole" series were on our right. Susan's House ruler is a Creative Grid product too. We love their stuff!

Joan Hawley of Lazy Girl Designs was on our left. I think I have been watching Joan demonstrate her purse patterns for well over a decade - is that possible? Her two new patterns are just as detailed and well thought out with step-by-step photos as they always have been.

Finishing out our little corner was Nancy Halvorsen. We are pretty excited about a new product we found that prints patterns right on to fusible web using your home printer. Nancy explained to Debby how to access a pdf of her artwork for the newest book and print the designs on the product - NO tracing! 'ya gotta love that!

From my point of view, one of the best things about this Open House is that Checker truly appreciates how hard we all work and Sunday evening after close, they take us all to dinner. It is a wonderful opportunity to catch up with other designers. I sat across from Eleanor Burns and next to Karla Alexander. Our table was close enough that I also had the opportunity to lean back and have a great conversation with Sue Hausmann. How's that for dinner companions?

I've known Eleanor for years, and it was nice to catch up on how her family is doing. This was my first opportunity to meet Karla, and it is easy to see why her books and rulers are so popular, we could easily become great friends! Check out that great mass of color behind her. Isn't her work beautiful!

It was my first opportunity to meet Sue Hausmann too. Naturally I feel like I know her from TV and I am quite sure that Sue had no idea who I was. She was gracious, delightful and I have to say that Sue is younger and so much more energetic and fun in person - I think PBS is so old fashion it actually ages people!

Sue and I have several things in common. This weekend tons of people were busy snapping photos and I don't think anyone took a good photo of either of us.

I don't think anyone would say that about Eleanor - she looked fabulous and entertained everyone with her barnyard presentation.


I'm adding this photo so that the next time your husband gives you a hard time about shopping at your local quilt store, you can prove to him that it could be worse - you shop by the yard - we shop by the bolt!
Now I am home for a few days before I have to head to Chicago for more Bernina training next week. The work here at home is piling up - what I really want to do is SEW!


Tuesday, August 17, 2010

Super Simple Sashing

Our very last setting option for the nine patch quilt is SIMPLE PIECED SASHING. There are hundreds of other options to explore, but this was intended to be a simple summer project, so let's not get too complicated! I do have to say that I am really looking forward to seeing photos of your finished quilt (or quilt top!) so please post them to the facebook page or email them to me at mailto:karen@thequiltcompany.com and I will post them for you.


Feel free to comment, make suggestions and let me know if you are interested in starting another project. We have momentum - why not keep going!


I think this simple sashing idea is the one that I will select for my finished blocks. I haven't decided on what color the sashing will be, although I have pondered the idea of colorwashing the blocks so that they shade across the quilt and doing the same with the sashing - in the opposite direction...... there I go complicating things again....


Before you select the fabrics for the cornerstones for your project, you need to decide if you want them cut from one piece of fabric or if you want them scrappy. Scrappy seems logical, especially if you, like me, cut WAY too many squares for your nine patches to begin with! But I do like the look of that constant periwinkle with those green blocks - it is so hard to decide!


SUPER SIMPLE SASHING


66" BY 82"
Materials


80 nine patch blocks


2 1/4 yards of sashing fabric


1/2 yard of cornerstone fabric (or 99 leftover squares)


2/3 yard of binding


5 yards of backing (you may be able to run the backing the opposite direction and use less fabric, but your fabric would have to be at least 44" wide after washing, with selvedge edges removed)


Cutting Instructions
From the sashing fabric cut:
30 strips 2 1/2" by the width of the fabric, cross cut these into 178 rectangles measuring 2 1/2" by 6 1/2"


From the cornerstone fabric cut:
7 strips 2 1/2", cross cut these into 99 squares measuring 2 1/2"


From the binding fabric cut:
8 strips 2 1/4" by the width of the fabric


Instructions
1. Arrange the nine patch blocks in 10 rows of 8 blocks each, inserting one sashing strip between each block. Press all seams toward the sashing strip. Each row should begin and end with a sashing strip.


2. Construct the sashing strips for between the rows by stitching together 8 sashing strips and 9 cornerstones for each row. The rows should start and end with a cornerstone. Press all seams toward the sashing strips. Make 11 rows.


3. Stitch the rows together to form the completed quilt top. Press.
Then add borders if you like and 'quilt as desired".
Is that enough inspiration to finish your project? Could you use a little more encouragement? Post a comment here on the blog about how you plan to finish your quilt between now and August 31st and I will select a winner from the comments and award a beautiful fat quarter pack of batiks! The winner is determined by random number generator, so everyone has an equal chance to win, but you have to sign your post to be eligible for the prize - I can't send a package to "anonymous"! You don't have to have your quilt finished to post a comment, just let us know how many blocks you have made or how you plan to finish your quilt. I can't wait to hear from you!

Monday, August 16, 2010

To the Point!

Give your basic setting block option an Art School Graduate look by turning the blocks on point!

On point settings are not complicated, you simply assemble the quilt in diagonal rows instead of straight ones. We are going to use the same 8 block by 10 block layout and alternate the nine patch blocks with solid squares of the fabric of your choice. Once again, the black squares indicate the setting squares in my design wall photo.

I want to encourage you to think about your quilting design before you select the fabric for your setting blocks. If you plan to use a simple all over quilting design, then a print fabric like a floral or multi color print to compliment your 9 patch blocks will be beautiful. If you want your 9 patch blocks to really make a statement, select a fabric that has a more solid look. Then fill those blocks with knock-your-socks-off quilting!

You may have seen my Desert Nine Patch quilt that was featured in a full page ad in several quilting magazines. Keepsake Quilting is offering a kit for it (so are we on our website.) I created the 9 patch top, but the quilt was really brought to life with the quilting that was done by Maryjane Efstathiou of Thistles & Thimbles. Those solid squares gave Maryjane the perfect place to show off her talent - to rave reviews!mailto:thistlesandthimbles@msn.com


If you look closely you will notice that not all of my solid squares are the same color. To make the quilt more interesting, I chose 2 shades of off white, Straw and Parchment, and alternated them in the setting blocks. I made that decision before constructing any of the 9 patch blocks, so I was also able to make the light blocks in the 9 patches coordinate with the setting blocks. Parchment against Parchment and Straw against Straw - after all I AM an Art School Graduate!

Now before things get even more complicated, lets get going on the instructions!

ON POINT SETTING

68" BY 85"

Materials:

80 nine patch blocks

3 yards for setting squares

2/3 yard binding

4 1/4 yards backing

Cutting Instructions

From the setting square fabric cut:

11 strips 6 1/2 inches

From these strips cut 63 squares measuring 6 1/2"

3 strips 10", cross cut these strips into 9 squares measuring 10 inches

Cut these squares diagonally twice to yield 4 triangles from each square for your side setting triangles

Cut 2 squares 6 inches and cut both in half, diagonally one time to yield 2 triangles from each square. These will be your corner triangles.


Instructions:

1. Arrange the 9 patch blocks in 10 rows of 8 blocks each, having each block on point. Fill in the center spaces with the setting squares. Fill in the outer edges using the large triangles. Place the smaller triangles on each corner.

2. Stitch the rows together diagonally beginning in one corner. Take care to orient the side triangles in the proper direction on each end of the pieced row. Press the seams in each row in the opposite direction of the previous row.

3. Stitch the rows together to form the completed quilt top. Press,

The setting triangles are cut to size, but the corner triangles are a bit over sized. Trim the corner triangles as needed.

Tomorrow we will cover sashing options!

Sunday, August 15, 2010

Nine Patch with Setting Blocks

Yesterdays simple Block-To-Block setting option results in a 48" by 60" finished quilt. If you are looking to make something a bit bigger, the easiest way to enlarge the project is with solid setting squares! I am going to assume that you are making 6 inch finished nine patch blocks for these instructions. If you have chosen to make another size, you are going to have to do some calculating on your own.

The photo shows just 9 of my blocks on my design wall with black setting blocks. I don't know that I am going to use black in my finished quilt, but it photographed the best with my block assortment and made it easy for you to distinguish which areas I am referring to. You are also going to have to make a few more 9 patch blocks for this setting!


ALTERNATING SETTING SQUARES


66" by 90" - a nice size for a twin bed


Materials


83 Nine Patch Blocks


2 2/3 yards fabric for alternate blocks


2/3 yard binding


5 1/2 yards backing


Cutting Instructions
From the alternate block fabric cut:

14 strips 6 1/2" by the width of the fabric
Cross cut these strips into 82 squares measuring 6 1/2"


From the binding fabric cut:
8 strips 2 1/4" by the width of the fabric.


Instructions
1. Arrange the blocks in 11 rows of 15 blocks each. Begin and end the top and bottom row with a nine patch block (you should have a 9 patch on all 4 corners)


2. Stitch the rows together, pressing the seams in each row in the opposite direction of the previous row.


3. Stitch the rows together to form the completed quilt top.


Adding borders to your quilt if you have an extra deep mattress is always an option! Remember to calculate for the "shrink" that will take place when you have the quilting done. When making a bed quilt I like to have the top at least 4 inches larger than necessary before it is quilted so that when the quilting is completed it isn't too short for the bed!


If you would like a much larger quilt, make 85 nine patch blocks and cut 84 solid squares. Set them in 13 rows of 13 blocks each for a 78" by 78" quilt. With the addition of 10" borders on all sides your quilt will measure 98" by 98" which is suitable for a nice size queen. - I mean queen size bed, I'm sure you deserve to be treated like a queen and your size is very nice too - but I meant the quilt! Before I get into too much trouble, you are going to need 3 yards of fabric for the border.


Tomorrow - on point options!

Saturday, August 14, 2010

The Nine Patch Project

I started the summer Nine Patch Project on Facebook way back in June, a little over 75 days ago. The concept is simple, make one nine patch each day and by the end of the summer you will have enough for a quilt. Easy.

It is now mid August, I have a stack of 9 patch blocks (and many more squares that will eventually become 9 patch blocks when I get "all caught up" - see the vacation post below.) For those that have been diligent (and in some cases over achievers) it is time to post the assembly instructions. Easier said than done. Technology and I don't always agree on what is possible and what I am capable of accomplishing. Normally I write and illustrate instructions for publishing, paper publishing, not electronic publishing. I draw diagrams, layouts and write step-by-step instructions. That is WAY to much to post on Facebook, so I am directing all 800+ participants in the project here to the blog for the finishing details.

I am going to post one simple setting option each day for the next several day. That way I can show you photos, give you dimensions and discuss the options for finishing your 9 patch quilt. These will be simple finishes, nothing complicated, but I've taken the math out of calculating the sizes and numbers of things to cut.
There are a few "first-quilt-ever" participants in the group, so I thought that I would begin by giving simple, detailed instructions to start. If you have no idea of how to finish this project:

BLOCK TO BLOCK SETTING
48" by 60"


Materials:
80 nine patch blocks measuring 6 1/2 inches including the seam allowance.

1/2 yard for binding

3 yards for backing

batting


Cutting Instructions
From the Binding fabric cut:
6 strips 2 1/4" by the width of the fabric

From the backing fabric cut"
2 pieces 54" by the width of the fabric. Remove the selvedge edge and stitch the pieces together to form a rectangle 54" by approx. 80".

Instructions

1. Arrange your blocks in 10 rows of 8 blocks each. The seams in your blocks should be pressed to one side. Turn your blocks or re-press a few seams so that the seams that touch when the blocks are stitched together are pressed in opposite directions. This will allow the seams to "nest" and make it easier for you to match the intersections.
2. Stitch the rows together, matching the seams in each block to the adjoining block. Press all of the joining seams in one direction, alternating the direction in each row. For example press row one to the right, row two to the left, three to the right, etc.
3. Stitch the rows together and press the seams in a uniform direction. All of the seams can be pressed in one direction or they can be pressed from the center out toward the edge.
Your quilt top should measure 48 1/2" by 60 1/2" including seam allowance.

4. Layer your quilt top with the batting and backing and baste the layers together. I prefer to thread baste instead of using safety pins, but pins are fine too. Your basting should be done in both directions (up and down and across) and close enough together that you can't put your hand on your quilt without touching it, about 5" apart is great.

5. Quilt as desired. - the infamous quilting instructions! You can easily quilt this project by hand or machine. If you are working by machine, you will need a walking foot for straight line quilting. If you have never done quilting before, taking a class at your local quilt shop is a great idea, or at least stop by and ask a few questions.

6. Trim the batting and backing so that it is even with the quilt top. Stitch the binding strips together end-to-end on a 45 degree angle to form one long strip. Press these seams open. Press the binding in half so that the right side is showing. Pin the binding to the quilt top, mitering the corners and stitch in place by machine. Fold the binding over the raw edge to the back of the quilt and stitch in place by hand.

TA DA - YOU'RE DONE!!!!