
I was going to have to dig in and learn to use the embroidery machines sooner or later. It wasn't that I didn't want to try, but lets face it, there are only so many hours in a day. I also have this never ending to-do list that is filled with things that I am totally capable of doing, without learning anything new... and I have "staff" that are embroidery experts. They embroider, I suggest projects. It has been a great relationship.
Last Saturday we had Embroidery Club here at the store. If you are in our area and own a machine or think you might ever want to own one, you should join us. The information and inspiration is excellent and the meetings are FREE. It doesn't matter what make, model or brand sewing machine you own. The meetings are for fun and inspiration. As always, my favorite part of the program is show and tell. Barb S. had a piece to show, but I was fascinated by the shirt she was wearing. It was beautiful. She graciously explained how and why she had made the shirt. The applique was to cover a stain.

BINGO! That was something that I could relate to and the whole how-to process clicked! I could do that! I happen to have a new white shirt with a coffee stain that wouldn't budge. That's a "before" photo of my shirt. With that stubborn stain it was about to go in the trash. With Barbs verbal instructions and a little help from my embroider specialists and Brandon our Tech, I (a total novice at machine embroidery) managed to turn my trashy shirt into a real treasure.
The process is a bit easier than working right on a shirt. When you embroider a garment you have to have a perfect placement. For my project the design was embroidered using white Isacord thread on a cream organdy fabric before it was placed on the shirt. Organdy has a bit of a sheen to it, it adds a little sparkle and holds the design together. The design I selected isn't a stand alone lace. I understand from the experts that without the organdy, the whole thing would have fallen apart - and we don't want that!
 I am getting a little ahead of myself. Before I stitched the design I had to select one with a solid outline. I couldn't find one I liked, so we used the Version 6 software to outline the design that I had selected. The outline created a stitching line about 1/4 inch away from the design that would later become my cutting line. I popped the organdy into the hoop with 2 layers of wash away stabilizer and pushed the start button on the machine. - simple!
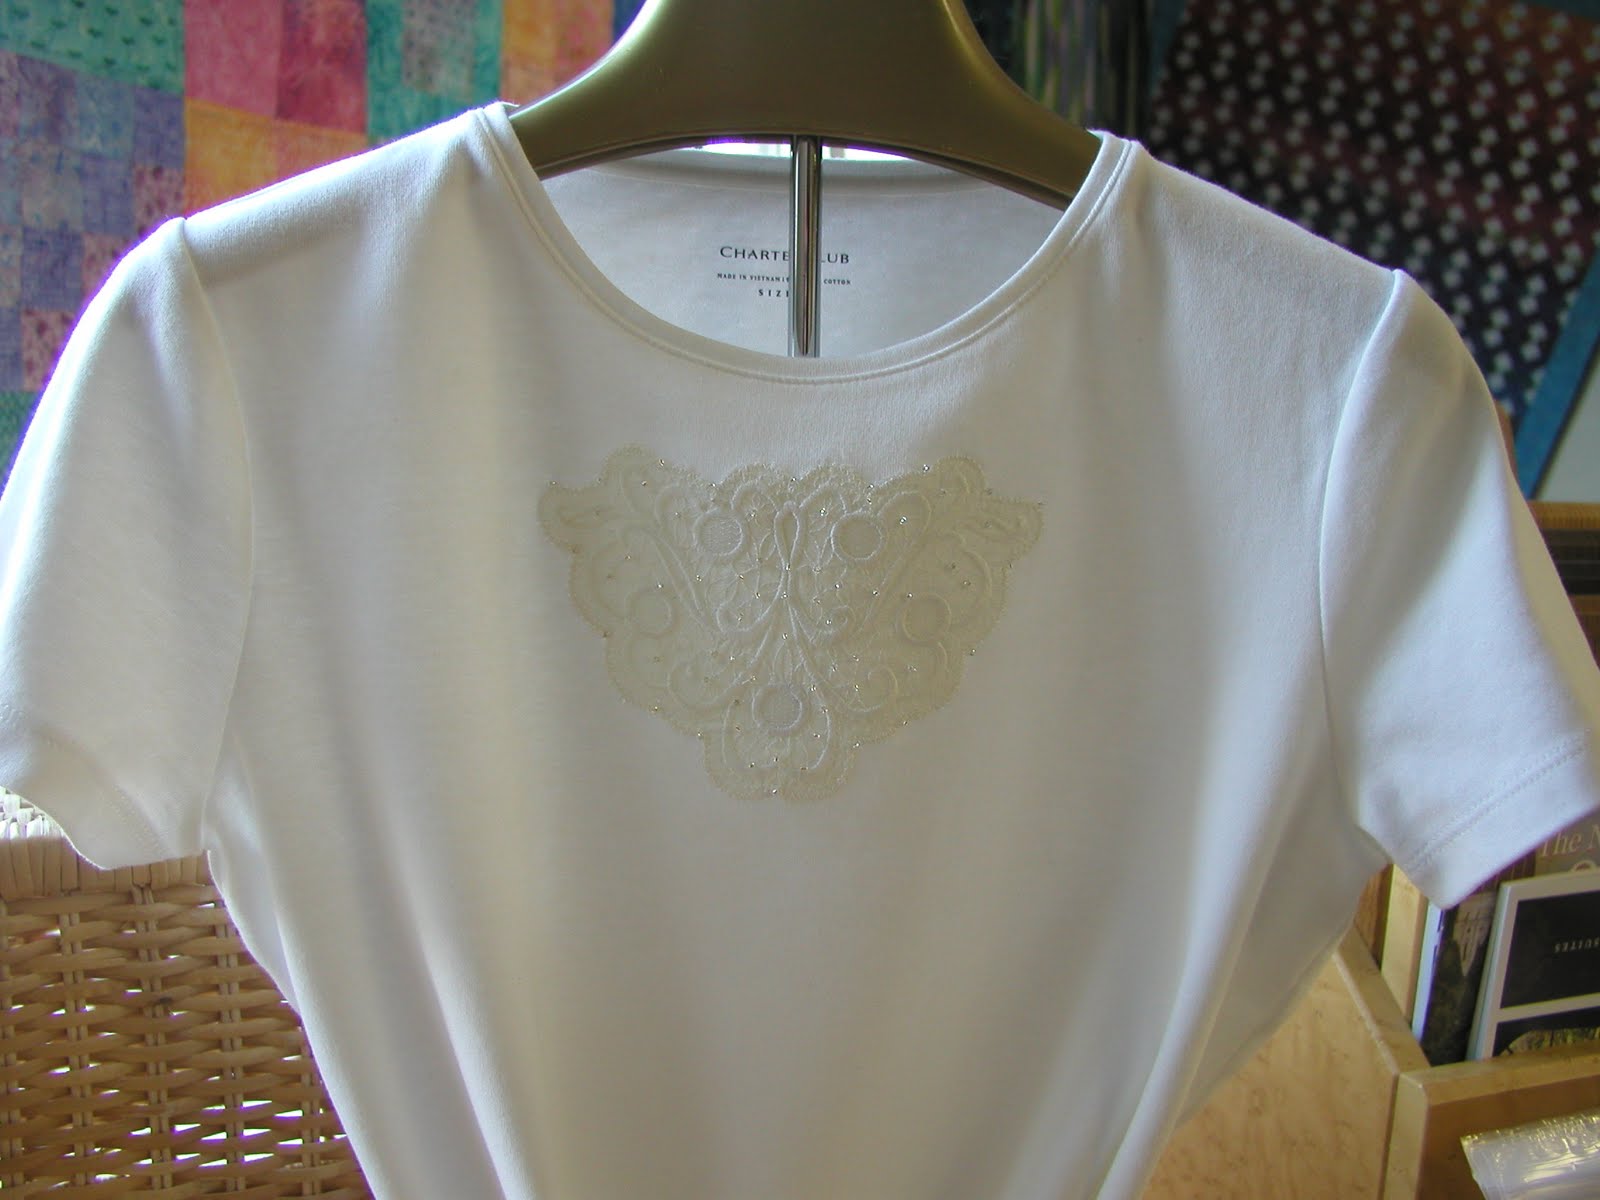 The idea is to create the applique, cut it out, remove the stabilizer, then place it on the shirt and stitch it in place. It worked like a charm. I used a spray adhesive on the back of the lace (after I removed the wash away stabilizer). The 505 spray allows you to peel and stick the applique in place until you are happy with the placement. Another layer of tear away stabilizer went inside the shirt while I stitched around the outside edge. Then I added a few clear seed beads for pizazz - don't you love it! Ok, I will admit it - I'm hooked!
 Next month we are going to use some embroidery magic to make the cute little pouch in the embroidery hoop - the entire thing - zipper and all - in the hoop! I can't wait!
Meanwhile I am in Cleveland for yet another round of Bernina training. This time we are working on the 830 and using the Cutwork tool. Someone is going to have to figure out how to add more hours to my day.....
1 comment:
Love it!!!!
Post a Comment